ShopDreamUp AI ArtDreamUp
Deviation Actions


Suggested Deviants
![[SFM Splatoon] Inkopolis Night](https://images-wixmp-ed30a86b8c4ca887773594c2.wixmp.com/f/ada23691-8539-4ad8-8d95-0388f2628875/ddvuoel-57cc4017-1022-44af-8108-b8b40f7fd941.png/v1/crop/w_184,h_184,x_36,y_0,scl_0.17037037037037,q_70,strp/_sfm_splatoon__inkopolis_night_by_antolaneyt_ddvuoel-92s-2x.jpg?token=eyJ0eXAiOiJKV1QiLCJhbGciOiJIUzI1NiJ9.eyJzdWIiOiJ1cm46YXBwOjdlMGQxODg5ODIyNjQzNzNhNWYwZDQxNWVhMGQyNmUwIiwiaXNzIjoidXJuOmFwcDo3ZTBkMTg4OTgyMjY0MzczYTVmMGQ0MTVlYTBkMjZlMCIsIm9iaiI6W1t7ImhlaWdodCI6Ijw9NzIwIiwicGF0aCI6IlwvZlwvYWRhMjM2OTEtODUzOS00YWQ4LThkOTUtMDM4OGYyNjI4ODc1XC9kZHZ1b2VsLTU3Y2M0MDE3LTEwMjItNDRhZi04MTA4LWI4YjQwZjdmZDk0MS5wbmciLCJ3aWR0aCI6Ijw9MTI4MCJ9XV0sImF1ZCI6WyJ1cm46c2VydmljZTppbWFnZS5vcGVyYXRpb25zIl19.ph1hsBEKA7cO6lSuZA2q1TJJmdhS8twv_tbj-c1rjiI)
![[SFM Splatoon] Inkopolis Night](https://images-wixmp-ed30a86b8c4ca887773594c2.wixmp.com/f/ada23691-8539-4ad8-8d95-0388f2628875/ddvuoel-57cc4017-1022-44af-8108-b8b40f7fd941.png/v1/crop/w_92,h_92,x_18,y_0,scl_0.085185185185185,q_70,strp/_sfm_splatoon__inkopolis_night_by_antolaneyt_ddvuoel-92s.jpg?token=eyJ0eXAiOiJKV1QiLCJhbGciOiJIUzI1NiJ9.eyJzdWIiOiJ1cm46YXBwOjdlMGQxODg5ODIyNjQzNzNhNWYwZDQxNWVhMGQyNmUwIiwiaXNzIjoidXJuOmFwcDo3ZTBkMTg4OTgyMjY0MzczYTVmMGQ0MTVlYTBkMjZlMCIsIm9iaiI6W1t7ImhlaWdodCI6Ijw9NzIwIiwicGF0aCI6IlwvZlwvYWRhMjM2OTEtODUzOS00YWQ4LThkOTUtMDM4OGYyNjI4ODc1XC9kZHZ1b2VsLTU3Y2M0MDE3LTEwMjItNDRhZi04MTA4LWI4YjQwZjdmZDk0MS5wbmciLCJ3aWR0aCI6Ijw9MTI4MCJ9XV0sImF1ZCI6WyJ1cm46c2VydmljZTppbWFnZS5vcGVyYXRpb25zIl19.ph1hsBEKA7cO6lSuZA2q1TJJmdhS8twv_tbj-c1rjiI)
![[SFM Splatoon] Seeing Raining](https://images-wixmp-ed30a86b8c4ca887773594c2.wixmp.com/f/ada23691-8539-4ad8-8d95-0388f2628875/de1kfr4-c9c20fa8-e75e-40e1-82ff-fa44aeae317b.png/v1/crop/w_184,h_184,x_36,y_0,scl_0.17037037037037,q_70,strp/_sfm_splatoon__seeing_raining_by_antolaneyt_de1kfr4-92s-2x.jpg?token=eyJ0eXAiOiJKV1QiLCJhbGciOiJIUzI1NiJ9.eyJzdWIiOiJ1cm46YXBwOjdlMGQxODg5ODIyNjQzNzNhNWYwZDQxNWVhMGQyNmUwIiwiaXNzIjoidXJuOmFwcDo3ZTBkMTg4OTgyMjY0MzczYTVmMGQ0MTVlYTBkMjZlMCIsIm9iaiI6W1t7ImhlaWdodCI6Ijw9NzIwIiwicGF0aCI6IlwvZlwvYWRhMjM2OTEtODUzOS00YWQ4LThkOTUtMDM4OGYyNjI4ODc1XC9kZTFrZnI0LWM5YzIwZmE4LWU3NWUtNDBlMS04MmZmLWZhNDRhZWFlMzE3Yi5wbmciLCJ3aWR0aCI6Ijw9MTI4MCJ9XV0sImF1ZCI6WyJ1cm46c2VydmljZTppbWFnZS5vcGVyYXRpb25zIl19.fL5vs2RWHdUcHFKQxcuRg6Z0mBiu7TTivTp59FvFo9g)
![[SFM Splatoon] Seeing Raining](https://images-wixmp-ed30a86b8c4ca887773594c2.wixmp.com/f/ada23691-8539-4ad8-8d95-0388f2628875/de1kfr4-c9c20fa8-e75e-40e1-82ff-fa44aeae317b.png/v1/crop/w_92,h_92,x_18,y_0,scl_0.085185185185185,q_70,strp/_sfm_splatoon__seeing_raining_by_antolaneyt_de1kfr4-92s.jpg?token=eyJ0eXAiOiJKV1QiLCJhbGciOiJIUzI1NiJ9.eyJzdWIiOiJ1cm46YXBwOjdlMGQxODg5ODIyNjQzNzNhNWYwZDQxNWVhMGQyNmUwIiwiaXNzIjoidXJuOmFwcDo3ZTBkMTg4OTgyMjY0MzczYTVmMGQ0MTVlYTBkMjZlMCIsIm9iaiI6W1t7ImhlaWdodCI6Ijw9NzIwIiwicGF0aCI6IlwvZlwvYWRhMjM2OTEtODUzOS00YWQ4LThkOTUtMDM4OGYyNjI4ODc1XC9kZTFrZnI0LWM5YzIwZmE4LWU3NWUtNDBlMS04MmZmLWZhNDRhZWFlMzE3Yi5wbmciLCJ3aWR0aCI6Ijw9MTI4MCJ9XV0sImF1ZCI6WyJ1cm46c2VydmljZTppbWFnZS5vcGVyYXRpb25zIl19.fL5vs2RWHdUcHFKQxcuRg6Z0mBiu7TTivTp59FvFo9g)
![[SFM Splatoon] So Tired](https://images-wixmp-ed30a86b8c4ca887773594c2.wixmp.com/f/ada23691-8539-4ad8-8d95-0388f2628875/ddwb2i1-3e50ab09-dd5f-49ed-b0f3-4db9fcc8d93c.png/v1/crop/w_184,h_184,x_36,y_0,scl_0.17037037037037,q_70,strp/_sfm_splatoon__so_tired_by_antolaneyt_ddwb2i1-92s-2x.jpg?token=eyJ0eXAiOiJKV1QiLCJhbGciOiJIUzI1NiJ9.eyJzdWIiOiJ1cm46YXBwOjdlMGQxODg5ODIyNjQzNzNhNWYwZDQxNWVhMGQyNmUwIiwiaXNzIjoidXJuOmFwcDo3ZTBkMTg4OTgyMjY0MzczYTVmMGQ0MTVlYTBkMjZlMCIsIm9iaiI6W1t7ImhlaWdodCI6Ijw9NzIwIiwicGF0aCI6IlwvZlwvYWRhMjM2OTEtODUzOS00YWQ4LThkOTUtMDM4OGYyNjI4ODc1XC9kZHdiMmkxLTNlNTBhYjA5LWRkNWYtNDllZC1iMGYzLTRkYjlmY2M4ZDkzYy5wbmciLCJ3aWR0aCI6Ijw9MTI4MCJ9XV0sImF1ZCI6WyJ1cm46c2VydmljZTppbWFnZS5vcGVyYXRpb25zIl19._6UESorbDGMEQmKE8nW6OaHdb75oHQ5hKKoB4xeORcE)
![[SFM Splatoon] So Tired](https://images-wixmp-ed30a86b8c4ca887773594c2.wixmp.com/f/ada23691-8539-4ad8-8d95-0388f2628875/ddwb2i1-3e50ab09-dd5f-49ed-b0f3-4db9fcc8d93c.png/v1/crop/w_92,h_92,x_18,y_0,scl_0.085185185185185,q_70,strp/_sfm_splatoon__so_tired_by_antolaneyt_ddwb2i1-92s.jpg?token=eyJ0eXAiOiJKV1QiLCJhbGciOiJIUzI1NiJ9.eyJzdWIiOiJ1cm46YXBwOjdlMGQxODg5ODIyNjQzNzNhNWYwZDQxNWVhMGQyNmUwIiwiaXNzIjoidXJuOmFwcDo3ZTBkMTg4OTgyMjY0MzczYTVmMGQ0MTVlYTBkMjZlMCIsIm9iaiI6W1t7ImhlaWdodCI6Ijw9NzIwIiwicGF0aCI6IlwvZlwvYWRhMjM2OTEtODUzOS00YWQ4LThkOTUtMDM4OGYyNjI4ODc1XC9kZHdiMmkxLTNlNTBhYjA5LWRkNWYtNDllZC1iMGYzLTRkYjlmY2M4ZDkzYy5wbmciLCJ3aWR0aCI6Ijw9MTI4MCJ9XV0sImF1ZCI6WyJ1cm46c2VydmljZTppbWFnZS5vcGVyYXRpb25zIl19._6UESorbDGMEQmKE8nW6OaHdb75oHQ5hKKoB4xeORcE)


Suggested Collections


![[MME] Grass Effect Modified](https://images-wixmp-ed30a86b8c4ca887773594c2.wixmp.com/f/e6b021c7-0683-41c8-ab77-c2958506ac2d/d9z3y5a-2b31ee71-947d-4ab9-b3b0-ed9e8e2b7601.png/v1/crop/w_184,h_184,x_36,y_0,scl_0.17037037037037,q_70,strp/_mme__grass_effect_modified_by_vadim07_d9z3y5a-92s-2x.jpg?token=eyJ0eXAiOiJKV1QiLCJhbGciOiJIUzI1NiJ9.eyJzdWIiOiJ1cm46YXBwOjdlMGQxODg5ODIyNjQzNzNhNWYwZDQxNWVhMGQyNmUwIiwiaXNzIjoidXJuOmFwcDo3ZTBkMTg4OTgyMjY0MzczYTVmMGQ0MTVlYTBkMjZlMCIsIm9iaiI6W1t7ImhlaWdodCI6Ijw9OTAwIiwicGF0aCI6IlwvZlwvZTZiMDIxYzctMDY4My00MWM4LWFiNzctYzI5NTg1MDZhYzJkXC9kOXozeTVhLTJiMzFlZTcxLTk0N2QtNGFiOS1iM2IwLWVkOWU4ZTJiNzYwMS5wbmciLCJ3aWR0aCI6Ijw9MTYwMCJ9XV0sImF1ZCI6WyJ1cm46c2VydmljZTppbWFnZS5vcGVyYXRpb25zIl19.ZlffwUKpOL1qzMTMOWLZVPtMkRCQ4WSY8S3gdy-KFnk)
![[MME] Grass Effect Modified](https://images-wixmp-ed30a86b8c4ca887773594c2.wixmp.com/f/e6b021c7-0683-41c8-ab77-c2958506ac2d/d9z3y5a-2b31ee71-947d-4ab9-b3b0-ed9e8e2b7601.png/v1/crop/w_92,h_92,x_18,y_0,scl_0.085185185185185,q_70,strp/_mme__grass_effect_modified_by_vadim07_d9z3y5a-92s.jpg?token=eyJ0eXAiOiJKV1QiLCJhbGciOiJIUzI1NiJ9.eyJzdWIiOiJ1cm46YXBwOjdlMGQxODg5ODIyNjQzNzNhNWYwZDQxNWVhMGQyNmUwIiwiaXNzIjoidXJuOmFwcDo3ZTBkMTg4OTgyMjY0MzczYTVmMGQ0MTVlYTBkMjZlMCIsIm9iaiI6W1t7ImhlaWdodCI6Ijw9OTAwIiwicGF0aCI6IlwvZlwvZTZiMDIxYzctMDY4My00MWM4LWFiNzctYzI5NTg1MDZhYzJkXC9kOXozeTVhLTJiMzFlZTcxLTk0N2QtNGFiOS1iM2IwLWVkOWU4ZTJiNzYwMS5wbmciLCJ3aWR0aCI6Ijw9MTYwMCJ9XV0sImF1ZCI6WyJ1cm46c2VydmljZTppbWFnZS5vcGVyYXRpb25zIl19.ZlffwUKpOL1qzMTMOWLZVPtMkRCQ4WSY8S3gdy-KFnk)


![Walrus Beach [3]](https://images-wixmp-ed30a86b8c4ca887773594c2.wixmp.com/f/0a25f89e-9f54-497b-b430-9698f44ee2ca/dgperdr-ec96c6b0-e515-4c67-b547-26b79966ab3d.png/v1/crop/w_184,h_184,x_36,y_0,scl_0.085185185185185,q_70,strp/walrus_beach__3__by_greenstarqx_dgperdr-92s-2x.jpg?token=eyJ0eXAiOiJKV1QiLCJhbGciOiJIUzI1NiJ9.eyJzdWIiOiJ1cm46YXBwOjdlMGQxODg5ODIyNjQzNzNhNWYwZDQxNWVhMGQyNmUwIiwiaXNzIjoidXJuOmFwcDo3ZTBkMTg4OTgyMjY0MzczYTVmMGQ0MTVlYTBkMjZlMCIsIm9iaiI6W1t7ImhlaWdodCI6Ijw9MjE2MCIsInBhdGgiOiJcL2ZcLzBhMjVmODllLTlmNTQtNDk3Yi1iNDMwLTk2OThmNDRlZTJjYVwvZGdwZXJkci1lYzk2YzZiMC1lNTE1LTRjNjctYjU0Ny0yNmI3OTk2NmFiM2QucG5nIiwid2lkdGgiOiI8PTM4NDAifV1dLCJhdWQiOlsidXJuOnNlcnZpY2U6aW1hZ2Uub3BlcmF0aW9ucyJdfQ.zOleZ_zUgqXJ0aDVsP-fXhpzKUHQPFfhP6XvmH-7D9s)
![Walrus Beach [3]](https://images-wixmp-ed30a86b8c4ca887773594c2.wixmp.com/f/0a25f89e-9f54-497b-b430-9698f44ee2ca/dgperdr-ec96c6b0-e515-4c67-b547-26b79966ab3d.png/v1/crop/w_92,h_92,x_18,y_0,scl_0.042592592592593,q_70,strp/walrus_beach__3__by_greenstarqx_dgperdr-92s.jpg?token=eyJ0eXAiOiJKV1QiLCJhbGciOiJIUzI1NiJ9.eyJzdWIiOiJ1cm46YXBwOjdlMGQxODg5ODIyNjQzNzNhNWYwZDQxNWVhMGQyNmUwIiwiaXNzIjoidXJuOmFwcDo3ZTBkMTg4OTgyMjY0MzczYTVmMGQ0MTVlYTBkMjZlMCIsIm9iaiI6W1t7ImhlaWdodCI6Ijw9MjE2MCIsInBhdGgiOiJcL2ZcLzBhMjVmODllLTlmNTQtNDk3Yi1iNDMwLTk2OThmNDRlZTJjYVwvZGdwZXJkci1lYzk2YzZiMC1lNTE1LTRjNjctYjU0Ny0yNmI3OTk2NmFiM2QucG5nIiwid2lkdGgiOiI8PTM4NDAifV1dLCJhdWQiOlsidXJuOnNlcnZpY2U6aW1hZ2Uub3BlcmF0aW9ucyJdfQ.zOleZ_zUgqXJ0aDVsP-fXhpzKUHQPFfhP6XvmH-7D9s)


Description
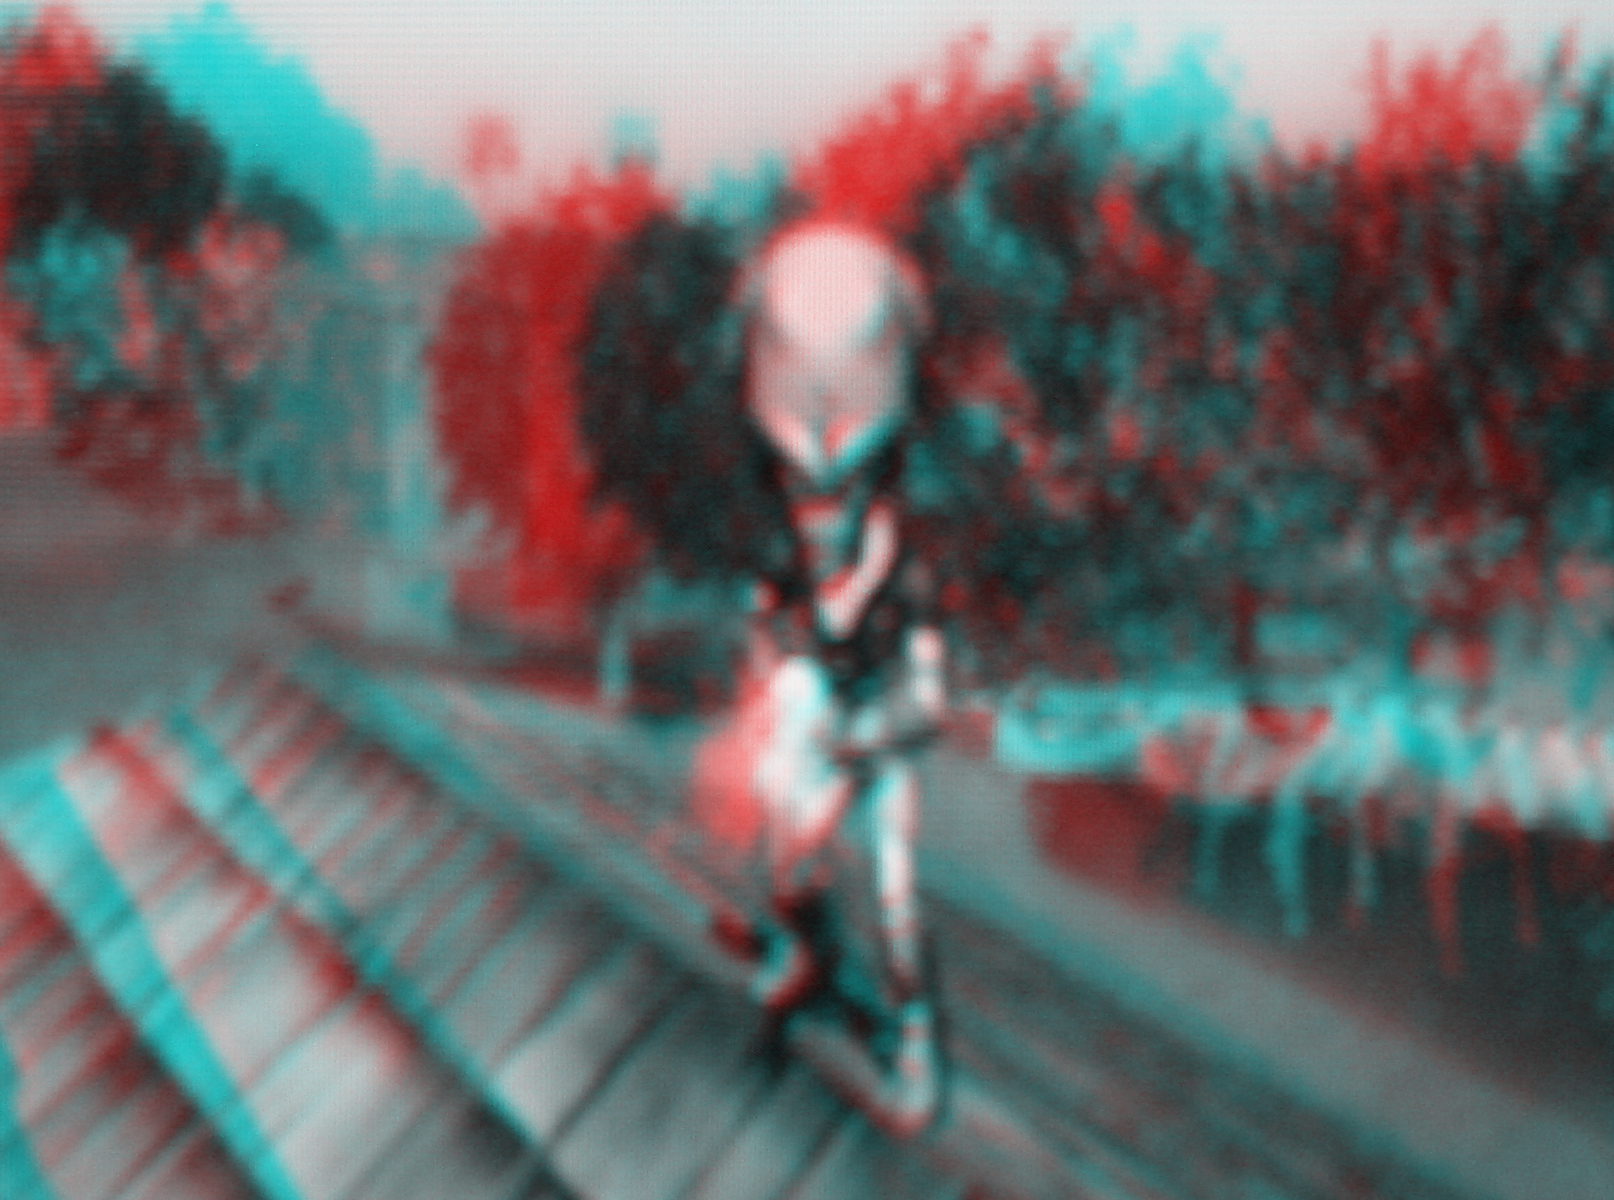
Don't have 3D glasses?
You can create your own red/blue 3D images to print, or look at on a computer
screen, using a normal digital camera and some image processing software. For
this activity we explain how to use Adobe Photoshop, but you should be able to
get the same results using similar programs by playing around with the tools and
settings.
To recreate this 3D effect in print or on a computer screen, we need to simulate
binocular vision. In short, we need to take two photos of our subject, separated by
a short distance (the distance between your eyes: about 3 inches), then make it so
your left eye only sees the left image and your right eye only sees the right. To do
this we will use red/blue 3D glasses and when viewed through the glasses, our
photo will appear three-dimensional!
Materials
• 1 Digital camera
• Photo editing software (Such as Adobe Photoshop)
• Red/blue 3D glasses (You can make your own!)
Activity procedures
Step 1
Start out by picking a subject. It is easier to take photos of objects or landscapes
because we need to take two photos that are as identical as possible. Shots of
people can work provided they stay very still and do not move in the time it takes
you to snap two photos. Take your first photo, then try to slide the camera over 3
inches and take the same photo again. One easy trick is to take one photo looking
through your left eye and the second while looking through your right. A common
mistake is to take the pictures too far apart.
Step 2
Download the photos to your computer and open them up in a photo-editing
software such as Adobe Photoshop. Any program will work as long as it allows
for red, blue, and green color channels to be manipulated independently.
Step 3
Once both pictures are open, convert them both to grayscale by clicking on
IMAGE in the menu bar and selecting MODE then GRAYSCALE.
[Image>Mode>Grayscale]
Step 4
Convert the right photo back to red, green, and blue (RGB) by clicking IMAGE on
the menu bar and selecting MODE then RGB (the image will still appear gray).
[Image>Mode>RGB]
In the Channels tab (in the layers palette between the LAYERS and PATHS tabs),
select the red channel by clicking on the word RED - NOT the little eye next to it
(eyes indicate which channels are displayed, not selected). Only that channel
should appear highlighted.
Step 5
Go back to the left photo and select the entire photo [Ctrl-A] for PC or
[Command-A] for MAC then copy the image [Ctrl-C] for PC or [Command-C] for
MAC, and finally return to the right photo and paste the image [Ctrl-V] for PC or
[Command-V] for MAC.
Step 6
Now you are ready to complete the merging of the left and right images. Go back
to the channels palette. Click on the little box next to RBG. An eye should appear
in all four channels but still only the red channel is highlighted. You should now
have a mostly black and white image with red and blue halos.
Step 7
You are nearly done. The left and right eye images need to be better aligned to
remove as many of the halos as possible. This is achieved by centering the two
images on the subject of your photo (typically what is in front and center - this will
be the easiest part of the 3D photo for peple to focus on). Select the move tool
[press V] then use the arrow keys to move the red image until you see the best
alignment. We are trying to remove the halos from around our subject, though
objects towards the edges will still be quite haloed.
Step 8
The final step is to crop the image down to the size you want using the crop tool
located in the tool bar (left hand column, third tool down). Try to remove areas of
excess red or blue around the edges. Once you have selected the area of the image
you want to keep hit ENTER to crop the image. Now that you are done, don't
forget to save!
Now when you look at your image using red/blue 3D glasses you should see the
scene appear in 3D, depending on which way your shifted the images you might
need to switch which way you are looking through the glasses. You should try
experimenting for a while with taking photos and creating the images to get the
best results.
Hints
1. Don't save the changes to the original photos, always work with a copy.
2. Try making other versions and centering on something else in your photo
(something more in the foreground or background) than what you originally
planned.
3. It may be helpful to adjust the alignment while watching through 3D glasses.
4. This method works especially well with close up photos of detailed and textured
things (use your camera's macro mode, usually indicated with an icon of a
flower which will make it auto focus even when very close to your subject).
Image size
550x400px 1.56 MB
© 2007 - 2024 Julianrocks
Comments34
Join the community to add your comment. Already a deviant? Log In
Might want to add "Anaglyph" to the title. That's what these images are referred to as - anaglyph photos.